KeebDeck Keyboard
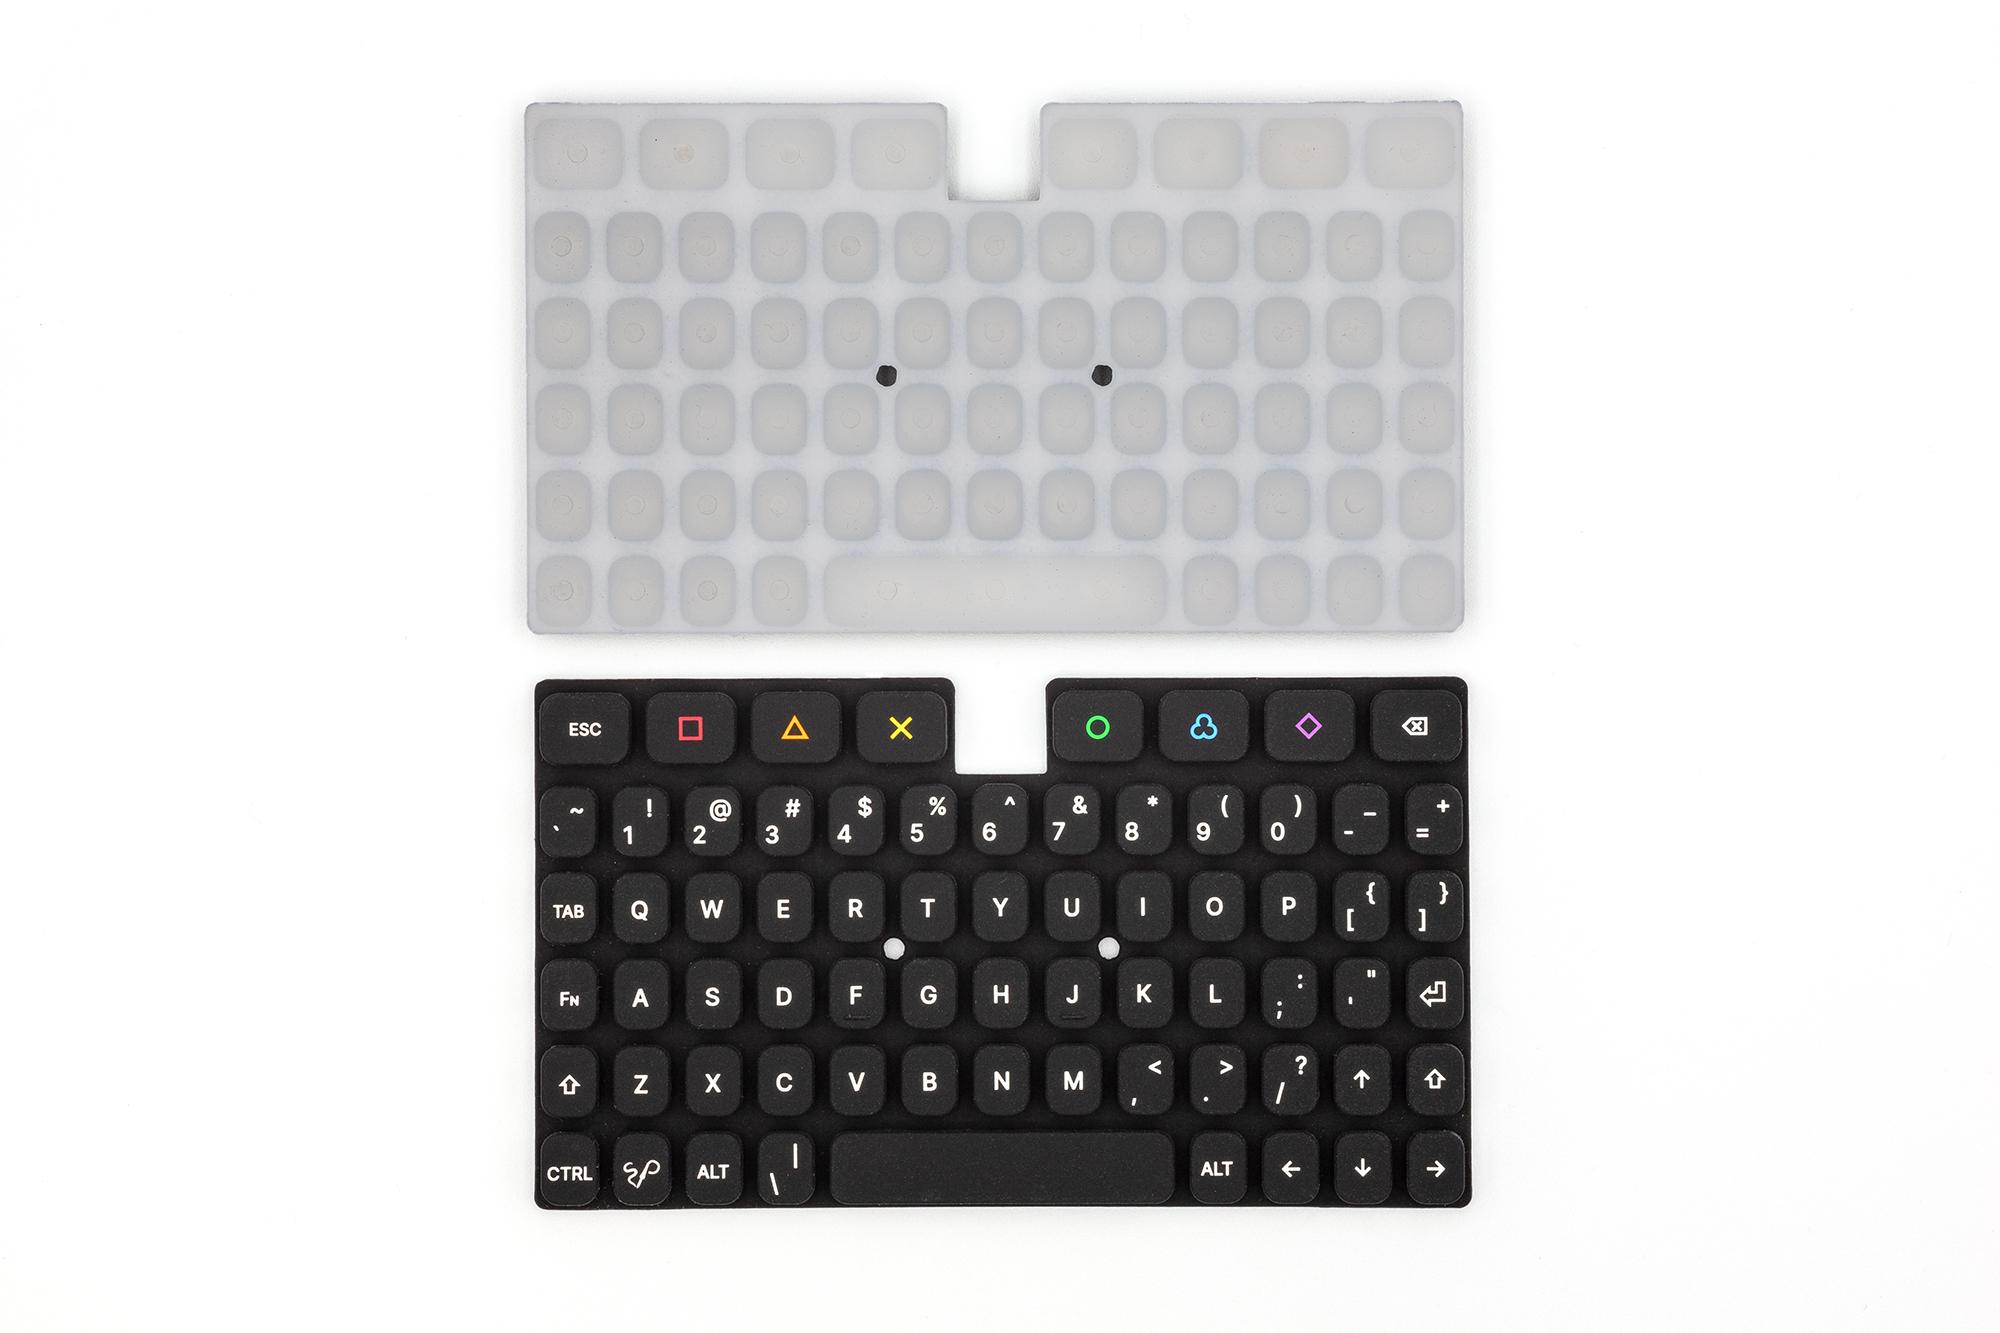
The KeebDeck Keyboard is the result of years of research, prototyping, and evaluation to create an affordable and easily available handheld keyboard for makers and hackers. The result is a compact (85x48 mm) 69-key alphanumeric silicone keypad with an orthogonal layout based on standard PC keyboards. It has all the keys you would expect, and a few extra ones that can be assigned any function.
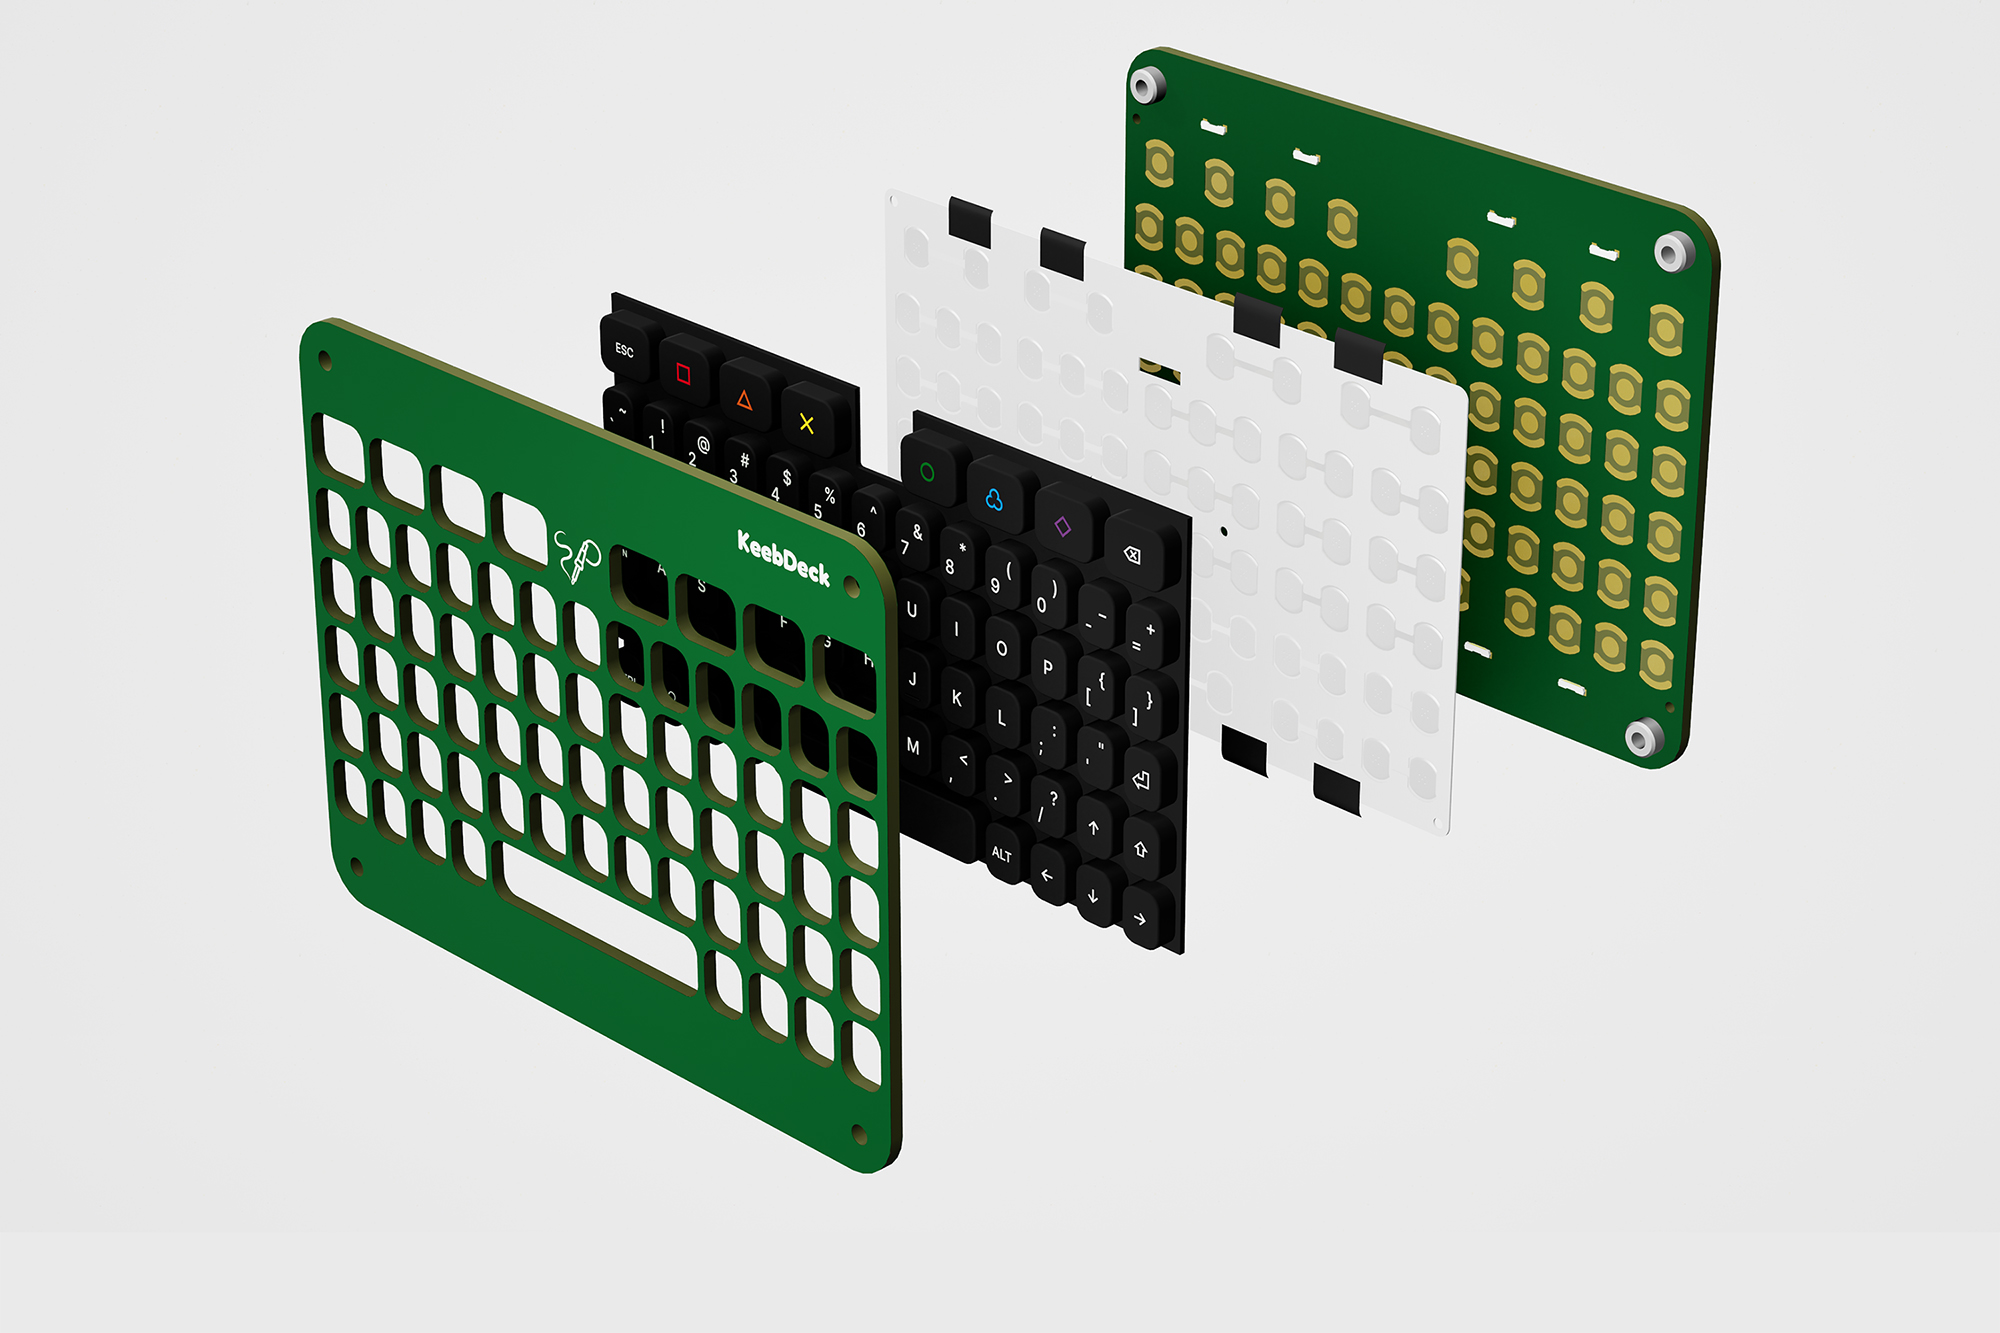
Note that the keyboard is just a component, there is no PCB, no microcontroller, no interface. This way, you can get the keyboard separately and use it in your own projects easily.
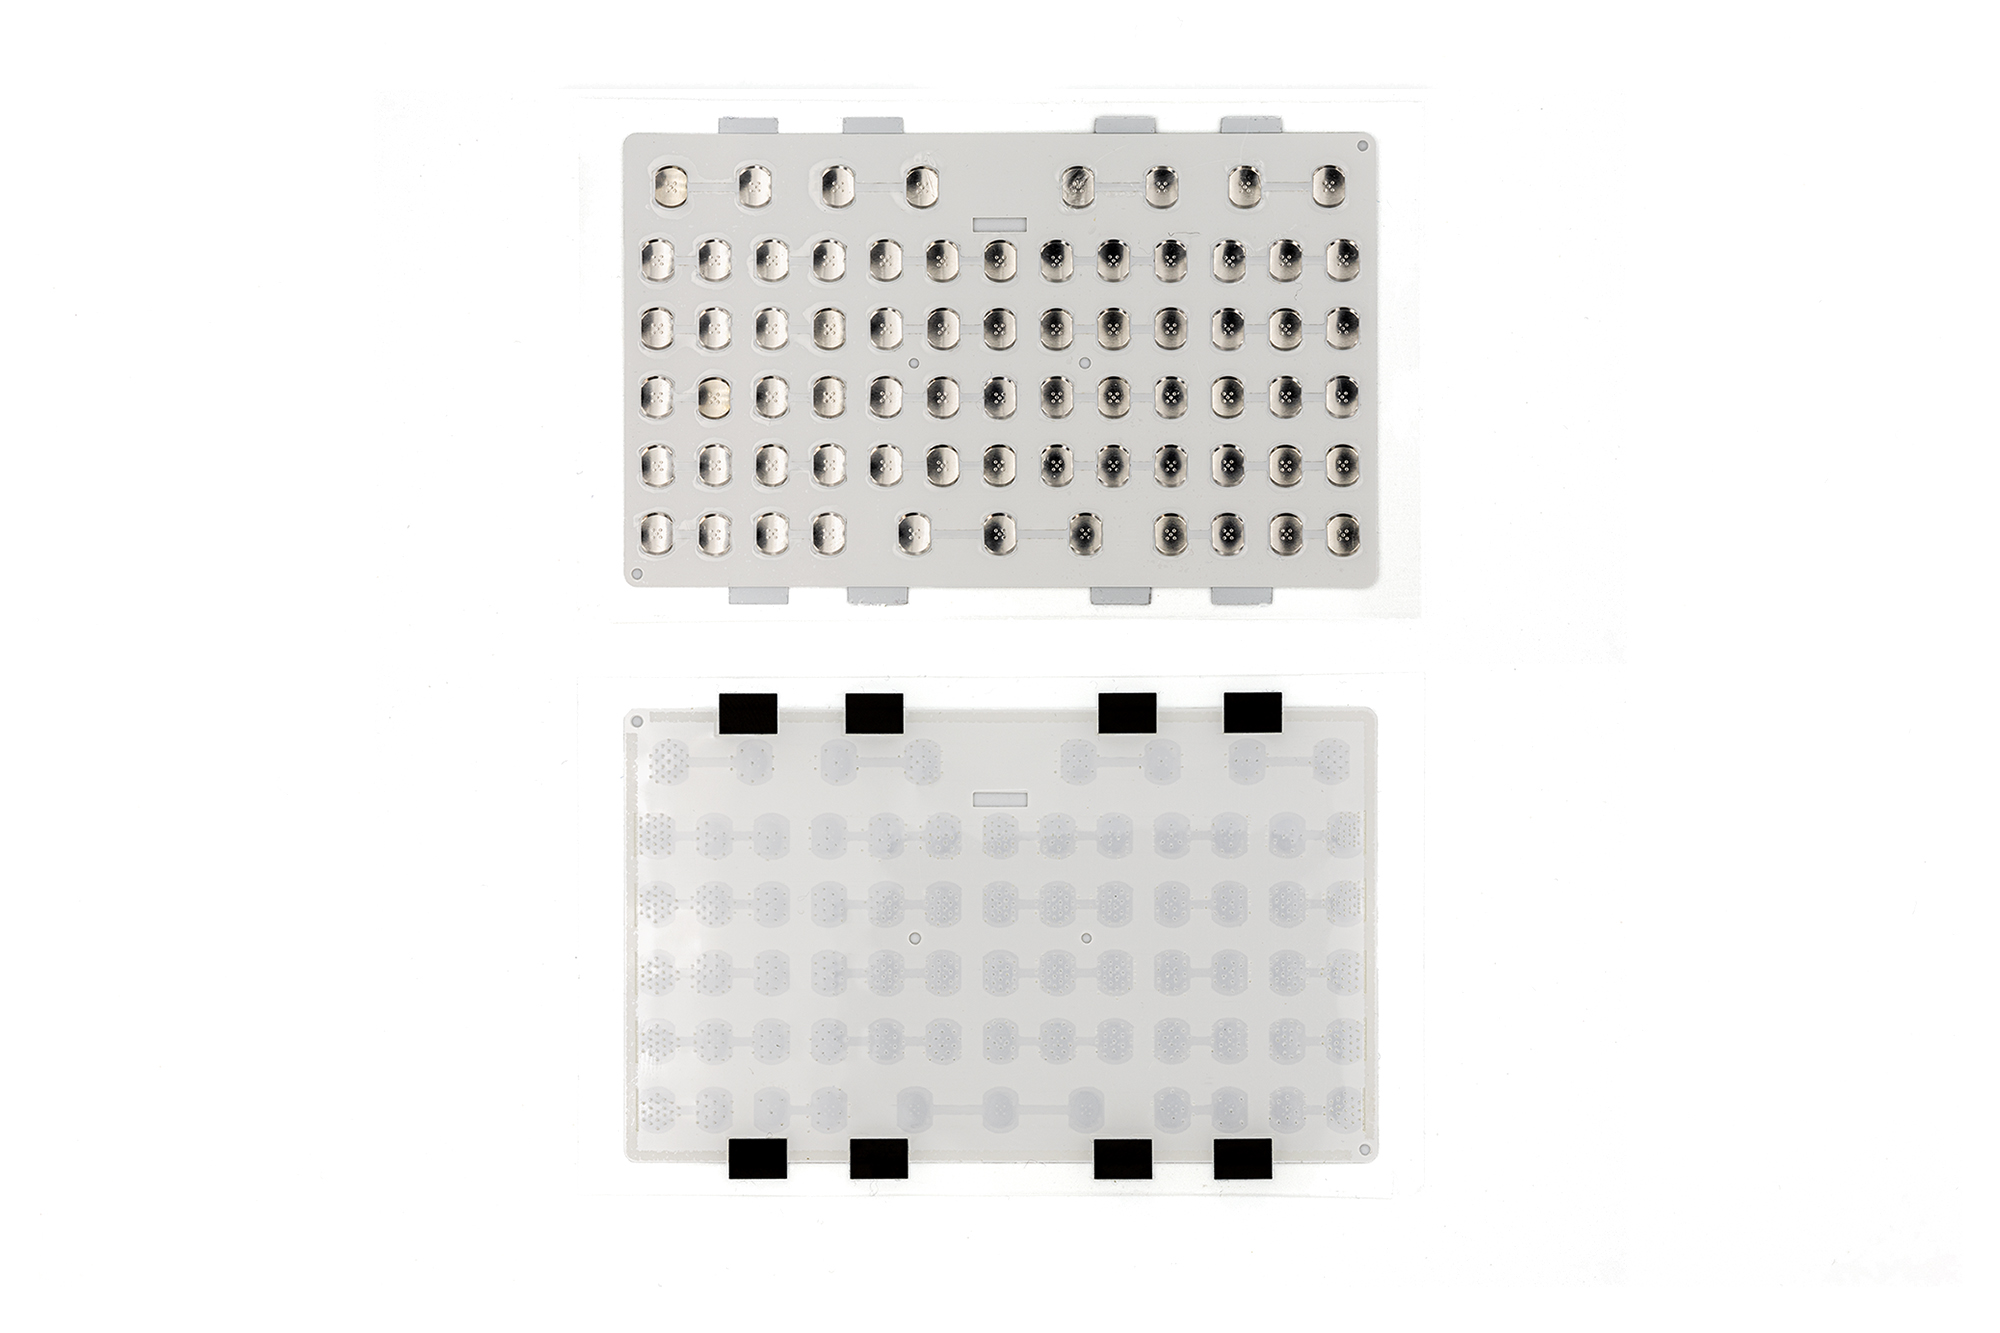
The KeebDeck Keyboard consists of two required parts: a silicone keypad and an adhesive metal dome sheet. The component utilizes a sandwich-style design, requiring a specific footprint to be placed on a PCB so that the adhesive dome sheet can be applied on top of it. The silicone keypad then goes on top of the dome sheet and requires a top case (another PCB, a 3D-printed/milled cover, etc.) to keep the keypad in place. See the render below for an illustration of the stackup. You can also check our KeebDeck Basic board for an easy and affordable way to evaluate the Keyboard before committing.
Backlight
The KeebDeck Keyboard can also be backlit using LTW-010DCG LEDs (or similar). The dome sheet has a special layer on top with diffusing dots etched in at strategic points. The LEDs are shining light into the dome sheet, the light then bounces off the dots and into the keypad. The LEDs have to be placed in specific positions, see the footprints or drawings for more details. The backlight is optional, but the dome sheet is required regardless of whether the backlight is used or not.
Using it
We, of course, provide all the open-source documentation, models, and footprints for popular PCB design programs. See Downloads for links to the sources, or Dimensions for dimensional drawings.
Key Dimensions
Most of the keys are 5.2x6.6 mm with a 6.6mm horizontal and 7.9mm vertical spacing. The top row keys are 8.275x6.6 mm with 9.675mm horizontal spacing. The cutout in the center of the top row, as well as the square cutout in the dome sheet, are designed to fit the PAW-A350 optical finger navigation (similar to the one used in the BBQ20). If using a PCB as the front cover, padding of at least 0.2mm is required.
More dome sheet details
The dome sheet has two holes in the corners meant to be used for the alignment of the sheet during application. It’s recommended to add the same holes to your PCB to make the application easier. The keypad and the dome sheet also have two additional holes near the center, which can be used for extra reinforcement to make the front cover more rigid. This is only really needed if the front cover is unusually large, or if it’s too flexible (for example, because it’s 3D-printed).
How it’s made
For the curious, the keypad is created by placing white silicone into a custom mold, then applying various inks under the macro keys, followed by covering the front in the black coating. The final step is to laser-etch the labels. This exposes the silicone (or the ink), allowing for the backlight to work.
How to drive it
The recommended way to drive the keyboard is by implementing it as a column and row matrix, but the final choice is up to you, depending on your project needs. The KeebDeck Basic mentioned above can act as a good starting point and reference design. Just like all our products, it’s open-source.
Customization
For large order quantities (500+), we can offer customization of the labels on the keys. Please get in touch to learn more. You can also check out the Community Showcase section for examples of customized keypads.
In addition to more KeebDeck boards, we’re also working on more size options (mostly smaller) to be available in the future.